Thursday 30 December 2010

Best of 2010

With 2010 drawing to a close I though it might be a good time to look back at some of the videos I’ve made this year. I’m not 100% sure exactly how many Photoshop tutorials and photography tips videos I made this year but for the purposes of this post I’ll stick to the publicly available content on my YouTube Channel.

So from the 28 videos I uploaded to YouTube here are the top videos in various categories…

Longest video - The 10 minute Emergency Christmas Card Photoshop Technique.
Made for my friends at
TipSquirrel.com I originally planned to call this the 5 minute Christmas card technique, but I quickly realised it was going to take much longer then I had planned hence the name.


Shortest video - Star Rotation Effect - Photoshop CS5 New Action.
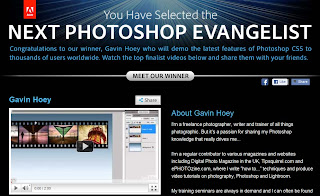
This was a video I made for the Next Photoshop Evangelist competition. Part of the entry requirements was the video had to be less then 2 minutes long and feature the concept of twenty. See if you can spot it!


Most Commented - Grey background lighting tips and tricks
Another studio/portrait tutorial but this time I demonstrated three lighting tricks with one grey background cloth.


Most Viewed - How to shoot an unusual self portrait.
Me, myself and I get together to make a very strange self portrait. The opening minute was great fun to make and was a learning curve on how to use Adobe Premiere Elements to creatively edit videos.


And finally my favourite video of 2010
To be honest I’m really happy with almost all of my videos, but there are a few that stand out.

Of the 15 minute challenges my last video of the year, filmed at Winchester Cathedral, is high on my favourites list. It produced some of the best images I’ve taken this year and was a location I intend to return to later in the year. The 15 minute challenge in Kens Field was a real tough challenge photographically, so coming back with anything worth showing is a success.

Teaming up with Jared Polin from Fro Knows Photo was a fun thing to try and may be repeated again in 2011 either with Jared or other photographers / Photoshop experts.

But if I had to pick just one video it would be Long exposure technique. It combines some useful photography tips with a bit of fun and produced a stunning photo. Incidentally there is an extended version of this video on the Photo Beach Teach DVD which includes the part where my cable release fell into the water!


So that’s it for 2010. Look out for more Photoshop videos, more Photography tips videos, more review videos and more 15 minute photo challenges videos in 2011.

Friday 24 December 2010

15 Minute Photo Challenge - Winchester Cathedral

It’s time for another 15 Minute Photo Challenge. In a change from my previous outdoor locations I decided to do this challenge inside the amazing cathedral in Winchester. Why inside? Well partly because it’s an excellent location brimming with photographic potential but mostly because it was cold, grey and snowy outside.

As always I had just 15 minutes to take the photos, however if I’m honest the timing went out the window slightly. Not my fault, honest.

As I was wondering around taking photos I was approached by one of the Cathedral staff. I was really expecting to hear the usual “no photos allowed here” comment, but instead the very understanding gentleman offered us a quick tour round the Crypt. How could I refuse…


Click the images to enlarge...

The statue (Silence II) is by Anthony Gormley and when the crypt floods, which if often does, the statue and its reflection look stunning. Fortunately or unfortunately, depending on your perspective the crypt was dry so we were able to walk inside.


At the back of the crypt was an early first world war grave marker. Most of these have been lost, destroyed later in the war or rotted away.

Monday 13 December 2010

How high is too high?

How high can your camera’s ISO stretch? OK, wrong question. How far would you be happy to push your cameras ISO and still be confident you could get a decent, usable image? Back in the days of my Canon 20D, the listed maximum was 1600 ISO, but the results were always horrible, so in reality 400 ISO was as high as I would go. My newer Canon 40D could also shoot at 1600 ISO in theory, but once again 800 ISO was as high as I liked to go to keep the image clean and usable.

My current camera is a Canon 5D Mark 2 which claims a maximum ISO of 25600 on paper, but in reality a maximum ISO of 6400 is suggested by Canon. Even so my previous high ISO experiences have meant I've limited myself to 3200 ISO when shooting in low light conditions such as at music gigs.

The photo above was a quick test I did to see what 6400 ISO actually looks like and I'm really happy with the results. The image looks more like the results I used to expect at 800 ISO on my Canon 40D. Click the image to zoom in and see for yourself.

The lighting was supplied by one very small candle which gave an exposure on the face of just 1/15th sec, f/4 ISO 6400. The lens was a Canon 70-300 IS and the shot was hand held, yes the Canon’s I.S. system really is that good!

Impressive as the results are, there’s no getting away from the fact that high ISO shots need a bit of post processing to really control noise and for me nothing beats the new noise reduction features found in Photoshop CS5 or Lightroom 3.


Click the image to enlarge.

Not surprisingly I’m going to class 6400 ISO as a usable setting for the 5D mark2 from now on.

Saturday 4 December 2010

Spudz Review ~ Stocking Filler Gift.

My top stocking filler gift for any photographer is the Spudz microfibre lens cloth from Alpine Innovations There's not one, but three features that make it my No.1 lens cloth and also a fantastic stocking filler.

Feature No.1 is the design. The whole cloth is pushed back inside a neoprene bag which means the cloth stays clean. The neoprene bag is also stitched to the cloth so you'll never loose the cloth, unless you loose the bag.

Feature No.2 is the hook. Having a cloth is all well and good, but finding the cloth when you need it is another matter. Fortunately the Spudz neoprene bag has a small plastic clip on the outside so you can attach it to your camera bag. The down side is the clip isn’t that strong, so I attach mine to an internal part of my camera bag for safety.

Feature No.3 is the cloth colour. This particular Spudz is 18% grey, which makes it ideal as an emergency gray card for metering and white balance. I say emergency as being a cloth it will have creases and possibly be dirty and that might affect things, but come on, it’s a lens cloth!
NOTE: not all Spudz cloth are 18% grey so make sure you buy the right one.

You can buy the Spudz cloth for around £8 - £10 in many photo retailers, Amazon.com or if you’re in the UK check out Crooked Imaging and them Gavin sent you!

Watch my video review below. If you can see it here watch it on Blip.tv http://www.blip.tv/file/4462717

Friday 3 December 2010

Photos from this evenings walk in the snow

It’s often said that we British love talking about the weather more then anything else and to be honest that’s probably about right, but with weather that’s as unpredictable as next weeks lottery numbers, who can blame us.

If you’ve been following me on either Twitter or you’re a reader of my Facebook page, you’ve probably noticed me talking about the unseasonably cold and snowy weather we’ve been experiencing of late. Well, I’m happy to report that the snow has stopped falling and the sun came out and that means it’s time to take some photos.

As every good photographer knows, light can make or break a photo and the best lighting can be found at either the beginning or end of the day. So with around before sunset my family and I set out on a snowy evening stroll across some local fields.

As the sun set, the fog rose. Here’s a few of my favourite images. Click an image to enlarge...


Camera: Canon 5d mark 2
Lens: Canon 28-135 is
ISO 400-800
Aperture f/5.6 - f/8

Wednesday 1 December 2010

Your Christmas gift from the Gavtrain Store

With Christmas right around the corner, I’ve got a very special festive gift for anyone who places an order in the Gavtrain store during the month of December (whilst stocks last)

They're limited edition keyrings which feature some of my favourite images from either one of my 15 minute photo challenges or a blog posts I’ve added this year.

They’re strictly one keyring per order and only while stocks last, so head on over to the Gavtrain store and place your order NOW!

If you need your DVD’s to be with you BEFORE Christmas then here are the all important last order dates.

4th Dec Australia, South America, Africa, Middle East, Far East, Asia
10th Dec North America and Europe
20th Dec UK & Channel Islands.

The sooner you place your order the more chance you’ll have of getting it before Christmas.

Frosty window pattern ~ Photoshop processing

On Monday I wrote a post about photographing frost patterns on glass. Well the frost has been replaced by snow here in the UK and that can mean only one thing. The country comes to a grinding halt.

But even though my photography work is on hold until the snow eases up, I’ve been keeping busy with a quick Photoshop tip for giving an icy feel to my frost images.

I also used this video to test out my new webcam. Sadly it didn’t quite work as well as I’d hope but if you like the idea I’ll get it better next time. Let me know what you think.

Monday 29 November 2010

Frost patterns on glass.

I’ve got to be honest, winter isn’t my favourite season. Give me spring and summer all year round and I’d very happy. Scraping the ice off the car windows is a daily chore and one which I usually do as fast as possible… but not today.

No, today I decided to embrace winter rather then hide from it. So out comes the camera and the macro lens. On goes the gloves and in to the car we go for some close up macro frost photography.

The set up is pretty straight forward. As well as my Canon 40D and Canon 60mm EF-S macro lens I used my Manfrotto tripod to get rock steady shots. The aperture was stopped down to f/16 for good depth of field. Car windows are often slightly bowed so shooting at the smaller aperture ensured good focus was maintained across the whole image.
To really keep the images tack sharp the shutter was tripped using the cameras two second self timer, but that's not all. I also used the mirror lock up function to ensure super sharp results. All images were shot in RAW, but what else would you expect!

For the record this is my car window... Remember great shots are all around you.

Friday 26 November 2010

Finally, the new DVD's are here.

Typical! You wait six months for a new training DVD to arrive and then two arrive in the same month.

Available right now in the Gavtrain Store is…

15 Minute Photo Challenge (Vol. 1)
If you’ve watched any of my 15 minute photo challenges then you’ve probably asked yourself this question. Great photos, but how did Gavin process them in Photoshop.

Well now you can find out exactly what happened after the shutter went click. I’ve taken five of my original photo challenges and added lots of the Photoshop and Camera RAW tips. The end results is two hours of my top Photography and Photoshop techniques.
Click here for more details...

Take & Make Great Photo
Five brand new photography tutorials and challenges. Fifteen Photoshop tips and techniques. Every single video is totally new and unseen so you’ll be in for a real treat. There’s even a brand new 15 minute photo challenge we filmed in the stunning city of Florence.

But that’s not all. As an extra bonus I’ve added some of my favourite Photoshop actions on the DVD. The Actions are all made by me so are totally unique.
Click here for more details...

Christmas Posting
If you’re think of buying anything from the Gavtrain Store the last day for Christmas posting on international orders is 9th December (3rd December for New Zealand, Australia, South & Central America, Caribbean, Africa, Middle East, Far East, Asia, )

Friday 19 November 2010

Gorillapod SLR Zoom, Test & Review

We all know that using a tripod can improve our photos. A Tripod reduces blur from camera shake, no matter what shutter speed you’re using. But there’s another way in which a tripod can improve your photos and that’s by slowing you down. Now that might seem a strange thing to say but by taking a little bit of time to compose the shot you’ll often end up with better photos.

OK so everyone agrees that a tripod is a good thing in principle, but like many people I rarely use one. The simple reason for that is tripods are heavy and awkward to carry around especially when you’re travelling.

On my recent trip to Florence I knew I’d want to take some low light photos, so a tripod was going to be essential. I also knew I wanted to travel light so I opted for the Gorillapod SLR Zoom.

The Gorillapod has been around for many years now and comes in a variety of sizes. The SLR Zoom is the middle sized offering from Joby. They claim it can hold up to 3kg in weight so I packed a Canon 400D and fitted it with a Canon 24-105mm lens. Weighing in at around 1.5kg it seemed like a good match for the Gorillapod.

The Goillapod is an odd looking thing. Made up of lots of rubbery ball joints it’s about 12” in length and very light in weight. So from a travel point of view it was the ideal choice and was no trouble to carry around. The legs don’t extend so you might class it as a table top tripod, but they do bend.

Joby makes a big thing about these bendy legs. The idea is you can wrap the legs around any handy object like a pole, tree or fence and your camera will stay there. The reality is surprisingly close to the marketing hype. It takes a bit of time and practice to get right, but you can indeed attach the Gorillapod to fences.

Sadly there are some weaknesses. The Gorillapod SLR Zoom doesn’t come with a built in ball head so you’re limited to portrait format shooting only. A ball head and quick release plate are available, but that adds extra cost and weight. I also found the Gorillapod to be very bouncy, picking up vibrations and blurring some of the images on long exposure shots or when the lens was zoomed in.

You can watch my video review below.


Conclusion.
The Gorillapod SLR Zoom is a great gadget. Well made, light weight and does what it claims. The bendy legs are an endless source of fun, but care is needed to get the best photos when using it for challenging long exposure images.

Rating:
So did the gorilla pod click my tick? Nearly. It gets a respectable three out of five from me.

Thursday 11 November 2010

Testing the BlackRapid strap by climbing 463 steps

If you've been watching some of my recent photography tutorials then you might have noticed that I'm not using a standard strap that came with my camera. A lot of people have asked me two questions, is that strap any good and and why switch from the camera makers strap? So I though I’d make a little video to show you.

Lets start with why I’m not using a Canon camera strap. Well because the stap that comes with my camera I find to be very uncomfortable when worn round the neck so I end up putting it over my shoulder. 30 seconds later it slips off. So I take it off my shoulder and it ends up dangling in front of the lens. Then there’s the whole “advertising a camera brand” thing to consider. Do I really want to be a walking advert for Canon or any other camera brand for that matter?

However everything changed earlier this year, when I got my hands on the RS-7 from Black Rapid.

From lots of real world use I already know it's safe and comfortable on a standard days photography, but what if I treated it to a little more energetic use? How good would it feel after a 20 minute climb to the top of the Cathedral in Florence? That's what you'll see in this video.

So how did the RS-7 strap perform? Pretty well is the answer. As I expected it bounced around a bit on the climb, but resting my hand on the camera solved that. Because of the design of the strap both the camera and lens are pointing down so you’re not rubbing the LCD against your clothes.

In term of comfort it was a joy to use. Despite the energetic climb I really didn't have any problems with the strap rubbing or slipping off my shoulder. Bothe the camera and lens reached the top (and back down) with out a scratch.

So would I recommend one? On the whole yes. If you're spending the day walking around then the RS-7 is unbeatable for comfort and security. If you're into action sports where you're running, jumping bouncing etc, then look out for the sports version of this strap (coming soon I understand)

Rating 4.5/5

Wednesday 3 November 2010

Memories of Florence

Recently I had one of those big number birthdays, the kind of number when life begins or as they say. Faced with the impossible choice of what present to buy Sam (my wife) wisely avoided anything materialistic and instead spent months planning an experience I’d never forget.

So last week I found myself on a plane with my family jetting off to the historic city of Florence, Italy.

It’s one of those iconic places what just oozes history and where ever you point your camera there’s a photographic opportunity.

Some images like this one are classic “must have” tourist shots and shouldn’t be overlooked simply because this is one of 100 identical images that were taken by me and 99 other people during the 15 minutes I stood in this spot.

Florence is packed full of art of all types. Sculptures are everywhere, paintings adorn walls and photographers fill the streets. I had a bit of fun counting DLSR brands as we walked around one of the tourist hot spots. For the record Canon & Nikon were seen in equal numbers, but I also spotted a couple of Olympus cameras and one Pentax.

Graffiti was everywhere and whilst it might be argued that it’s a form of art, I disagree when it’s applied to historic buildings and even statues.

I’m a bit of a low light fan and Florence is one of those cities that looks as good at night as it did in the day. Their electricity bill must be huge! It’s not easy to take great low light shots, but that doesn’t stop everyone trying. It never ceases to make me smile when I see people use the cameras built in flash to photograph a building and then look surprised when it didn’t come out well. At least with digital cameras they only waste batteries.


I recorded several videos during my visit to Florence which I’ll post on the internet. Keep checking the blog or Facebook or Twitter.

Tuesday 19 October 2010

My Low Light Set Up.

Following on from a recent post I made on Facebook and FlickR there was a lot of photographers all asking a very similar question… Getting great shots in low light, what’s my technique.

Lets start with the photo to the the right. It’s a wide shot which was taken at a recent gig in a local library. It's not a great shot but I wanted to give you an idea of the situation I found myself in. The only light in all the photos in this post came from six small “disco” lights either side of the stage, which went on and off at random intervals.

Now library and gig aren’t words I’d normally put together and sure enough it was a bit of a weird event, but that’s a whole other story. No this was a classic low light situation where I had to nail the shot without resorting to flash and without using a tripod.

Gear guide:
Now normally I tell people that equipment really isn’t that important, it’s the person behind the camera that makes the image. Now whilst that’s true, low light photography is one of the exceptions to that rule. Gear really does make a difference when there’s very little light and every shot is hand held.


Camera Body:
When it comes to low light photography you’ll need a DSLR if you’re going to capture quality shots.

Almost any DSLR camera body will be OK in low light, but I love my Canon 5D mark 2. One of it’s party pieces is it’s ability to shoot at very high ISO. For example many of these images were shot at 3200 iso which is at the upper limit I will use with the knowledge that the noise levels will be acceptable. The 5D is also a full frame DSLR camera which means it’s performance at high ISO’s is exceptionally good and by good I mean 3200 ISO show the same amount of noise as my older Canon 40D at 800 ISO.

Lens Choice:
The lens you use is probably more important then the camera for this type of low light work. I Used my favourite Canon 24-105L lens for most of these shots it has a maximum aperture of f/4 which means it lets in a pretty decent amount of light and that keeps the shutter speed up. It’s image stabilised to further reduce camera shake (but not motion blur) and it’s focus is fast and accurate.

For the really close up shots I switched to a Canon 70-300 IS lens. It’s a bit of a budget lens and zoomed in, only has a maximum aperture of f/5.6, but the image stabilisation is very good.

Camera Settings:
Other tips I can offer would be use Aperture priority mode and keep the aperture wide open to maximise shutter speed and minimise blur from both camera shake and motion blur.

Use continuous shooting to get a series of shots and capture great expressions like this.

Auto ISO is also a handy feature. Now normally I avoid auto features at all costs, but if you know you’re going to be shooting at the cameras maximum ISO (as I was here) auto ISO will drop the ISO if and when the lighting improves.

Finally
If you are faced with shooting a music gig in a library, don’t panic. It may not be Glastonbury music festival but great photos are there to be captured, just like these.


FOLLOW UP:
A couple of questions have come up on post processing. All these shots have been processed in Lightroom. This would include sharpening & noise reduction as well as colour & contrast adjustment.

However don't confuse adjustment with "make over" as very little needed to be altered from the "as shot" originals. In fact the 400+ shots taken on the night we're sorted, adjusted and the best emailed to the relevant media organisations with in 60 minutes of getting home.

Sunday 3 October 2010

Moody Mono in Lightroom 3 - Video

Lightroom 3 is a big part of my workflow because of it’s amazing ability to process a whole days shoot in just a few hours. Picking the keepers from the rejects is surprisingly simple and because Lightroom uses the same engine as Adobe Camera RAW there’s a huge amount of control at my fingertips.

I’m currently working on some Lightroom tutorials so I thought I’d test the water a little. So in this video I’ll show you how you can use Lightroom to process a moody black and white image.

Even if you don’t use Lightroom you can still follow along as you’ll find exactly the same tools in Adobe Camera RAW (ACR) found in Photoshop CS3, CS4 and CS5.

Tuesday 21 September 2010

And the winner is…

…Everyone who read’s this blog, follows me on twitter or Facebook.

Thanks to the amazing outpouring of kindness and commitment from so many people over the past two weeks, I’m now the official winner of Adobe’s Next Photoshop Evangelist Competition.

What does this mean for me?
Well, I get some software (which is nice) but more importantly, I get to teach Photoshop tips and tricks in front of a new and potentially much larger audience. Photoshop World in spring 2011 awaits and I’ll be there.

What does this mean for you?
I can’t thank each and every reader who voted inperson, although I’d like to. So instead I’ve uploaded a free video which is exclusively available to you. Call it my gift of thanks.

http://www.vimeo.com/15151381 PASSWORD: thankyou (all one word, all lower case)

You can watch it right now, for free, in High Definition (requires a good broadband connection) when you click the white HD logo under the video. I usually keep HD reserved for my training DVD's, so make the most of this one.

Eventually this video will make it onto my YouTube channel, but not in glorious HD.

Don't forget to take a look at the runners up.
They both made excellent videos. The video by David Rogers is very educational, but I really liked the puppet warp video by Mark Heaps.

Sunday 19 September 2010

Three Photoshop CS5 tutorials in under 6 minutes!

If you’ve been following me here on the blog, on Facebook and now on Twitter, you will have noticed I’ve been banging on and on about being chosen as a finalist in Adobe’s Next Photoshop Evangelist competition.

So far things are going well and I owe a huge thank you to everyone that's voted. I also know many of you have also been busy spreading the word around the internet, which is fantastic. There’s still a couple of days to go so
please keep voting (once a day).

As a little "thank you" I have an exclusive video lined up for everyone that’s been voting. Details to follow.

In the meantime here are three of my videos that didn‘t make the cut. They all have three things in common.
1 ~ They all use a new feature of Photoshop CS5
2 ~ They all play for 2 minutes or less.
3 ~ They all have the concept of 20 in them (see if you spot where)


If you’d like to see all 12 videos for the Next Photoshop Evangelist competition
click here.

Saturday 11 September 2010

Creative borders & Lightroom

My blog post for Tip Squirrel is now live. Here’s the link: www.tipsquirrel.com/index.php/2010/09/5-creative-borders-for-lightroom/The Tip Squirrel website is in the middle of running it’s Lightroom fortnight and my post is about adding creative borders without leaving Lightroom. You can watch my exclusive video tutorial on borders and better still there is a collection of border effects which can be downloaded totally free of charge.

If you’re not currently a Lightroom user, Tip Squirrel is giving away a copy of Lightroom 3. All you have to do is add your best photo on their FlickR page. Click here for more details and to see another one of my videos (yes, it’s been a busy week) with some helpful tips.

At the moment there are very few entries so your chances of winning are looking pretty good ;-)

Wednesday 8 September 2010

I need your help…

I'm absolutely thrilled to discover that two of my video tutorials have been selected for the final of The Next Photoshop Evangelist Competition run by Adobe.

So now I’m looking for help.

I’ll make no secret about this… I want to win and I need you to vote. Not just you, I need your friends, your followers, your next door neighbour’s friends.. You get the idea.

You can vote once a day until the 20th Sept by clicking here http://www.nextphotoshopevangelist.com/?page=view&video=14250097

Crazy as it sounds, please don’t vote for my other video, it will split my vote in two. Besides http://www.nextphotoshopevangelist.com/?page=view&video=14250097 is the better video in my opinion.

Thanks for your support.

UPDATE: I've recieved several similar comments about the video lacking the "cancept of 20" as required in the competition rules. All I can say is what number was on the Ice Cream hut?

Tuesday 7 September 2010

Join me on Twitter

I finally succumbed to the lure of twitter.

It’s still early days, but it’s already proving to be a firm favourite. Partly because it’s accessible as an app on my Android powered phone, but mostly because it’s short and concise.

You can check out my twitter page here. http://twitter.com/Gavin_Hoey

Sunday 5 September 2010

Great photos, you must be good at…

Good at what, Photoshop or Photography? Without blowing my own trumpet too much, I like to think that I’m half decent in both disciplines, but have a look at this photo and ask yourself this... Did Gavin use Photography skills or Photoshop skills to get the finished shot?

The answer is photography, I used off camera flash, but why do I think that's important?

Everyone knows Photoshop can do amazing things to enhance or even totally change an image. "Fix it in Photoshop" is a phrase I hear alot. But Photoshop isn't a fix it tool, it's a creative tool so for straight photography I prefer to get the shot as close to perfect in camera.

I sometimes feel photography skills get under valued.

The photos in this post are all from the wedding we attended last Friday. Taken just after sunset I pulled the Bride & Groom away for a 10 minute low light shoot. I used two locations, the first was the road right outside the hotel which was nicely lit up. The second loaction was under a garden arch and against the nights sky.

The groom is a very talented young photographer which he gets from his Dad. I’ve known the family for years and I also knew they'd understand the camera skills required to get the shots you see here

As a rule I don't show my subjects unedited photos on the back of the camera but ocassionally I will. That way they can appreciate the photography skills and not assume everything is done in Photoshop.

I know someone will ask how it’s done. It’s all about trial and error. I balanced the off camera flash power and the distance to subject with the camera settings to mix flash and ambient light. Google “Strobist” for lots more info.

Here you can see Sam holding the speedlight which is illuminating the bride & groom. A slow shutter speed of 1/15th sec ensured that enough ambient was recorded along with the burst of flash and no, I didn’t use a tripod.

Friday 27 August 2010

Op/Tech Rainsleeve - Video Review

I really hate the rain and just lately we’ve had more then our fair share of wet weather. Obviously getting rain on your camera isn’t going to be a good thing and is best avoided where ever possible, but a rainy day doesn’t have to be a photography free day.

This image was taken in the rain using a Canon 40D. Good as the 40D is, it makes no claims to be weather proof, so I use a rain cover to keep the water out.

Rain covers range from the quick DIY solution of a plastic bag over your camera, right through to a fitted rain jacket with arm holes and thermal linings. It’s all about need. If you’re a happy snapper then the plastic bag is OK, but if your job is photographing golf matches then you'll want the expensive pro stuff so you can keep working whatever the weather.

I’m somewhere in between. There are times when I need to keep shooting in wet weather, but most of the time I can wait it out. That’s why I always carry a Rainsleeve from Op/Tech in my kit bag.

These things are so cheap (around £6 for two) that I bin them when they’ve been used. They also tiny when folded so take up next to no room in my bag.

The bad news is getting the Rainsleeve to fit on your camera is a bit tricky, but once it's on you can hand hold your camera or stick it on a tripod. Long lenses aren't a problem as the sleeve caters for 7" round and 18" long lenses. You can even make a little hole in the sleeve and keep using the tripod ring on your lens.

Judge for yourself in my video review Below.

Rainsleeves are available from loads of retailers all over the world. Here’s one from my friends at Crooked Imaging.

Friday 20 August 2010

The Angel of Hope

Hope, is a small town in the Peak District of Derbyshire and it was there that I found myself on a grim, rainy August morning, waiting for my wife & daughter to return form a visit to a local shop.

With nothing to do, I could either sit in the car or put on my coat, grab my camera and brave the rain. The church was locked so that foiled my plan to shoot some photos in the warm and dry church. Walking back to the car I spotted this grave stone which looked like it had potential.

So I spent a good 10-15 minutes just photographing the “Angel of Hope” as I called her. Like many photographers I sometimes find myself just taking the obvious shot, especially when it's cold and wet. So I this time I challenged myself to look for different ways of photographing the angel. Moving around to find new angles, changing lenses and playing with apertures will make your images look unique.
On the photo above I’ve swapped to short telephoto lens (105mm) to compress the image and bring the church closer so it becomes a background.
This is probably my favourite shot. The 105mm focal length compress the image and that’s combined with a large f4 aperture to blur the background. Look closely and you’ll be able to the falling rain.


The lesson here is don't let the weather stop your photo fun.

Thursday 19 August 2010

Victim of success

Good news and bad.

The good news is gavtrain.com is going from strength to strength and the visitor hits have been rising at a fast pace. The bad news it the popularity of the gavtrain has caused the site to go temporarily off line.

An upgrade has been put in place but I’m at the mercy of my web hosts who have a habit of being frustratingly slow at implementing upgrades and fixes.

Normal service should resume in the next 24 hours.

Gavin.

Monday 16 August 2010

Photography and the National Trust.

Over the past year or two the National Trust (NT) in England has been getting some bad press amongst photographers. Some people have fallen foul of NT rules which restrict professional photography simply by using a DSLR. Personally I’ve never had a problem with the NT despite being a very regular visitor to dozens of National Trust properties with my camera.

One thing that all NT visitors will be aware of is its policy of indoor photography. Basically, whilst you can shoot away to your hearts content outside, you have to put your camera back in the bag when you go inside.

But there seems to have been a change of heart at the National Trust as their website reveals.

"Amateur photography (including filming) without flash is now permitted in historic interiors at the Property Manager’s discretion. As with outdoor photography, any photographs taken are strictly for private use, and enquiries about selling or publishing photographs should be directed to photo.library@nationaltrust.org.uk. However, visitors must be aware that at some places, there may be copyright issues, and further permissions may be required in respect of collections not owned by us. In these situations the Property Manager decision as to if photography is allowed is final."

So to put this new found photo freedom to the test, we paid a visit To Calke Abbey, near Derby, which has many semi derelict rooms alongside the usual pristine show rooms. A few of the results are below.

So now I can confirm that I was able to take indoor photos without any problems. In fact other then a few sideways glances from other visitors I was able to snap away as much as I liked.

Old bottles in the wine cellar


Semi derelict corridoor, Calke Abbey

Books in Library

Servants room


Friday 6 August 2010

Where’s Wally (Waldo) – Photo homage

If you’ve ever read any of the Where’s Wally, or Waldo as he’s known in the United States, then you’ll already know this game. For everyone else, here’s how it works.

Here’s a slice of British life captured. It’s a very high resolution image (around 50 million pixels) that contains lots of interesting detail. All you have to do is find it.

Can you find…
  1. The boy up to his neck in sand
  2. The amazing floating spade
  3. The only man looking at the camera
  4. The happy little dog
  5. The Guitar on the beach
  6. The Union Jack Bag

To stand any chance of spotting these things you’ll need the high res file (roughly 6mb). Either click the main image or click here.

The image is copyright Gavin Hoey Photography 2010. Do not publish/print/pass on without permission.

Monday 2 August 2010

Better backgrounds = Better photos

It’s very easy to get caught up in the emotion of taking photos and forget a few basic rules. Important rules like checking your camera’s ISO isn’t set to 1600, that the lens isn’t switched to manual focus and the self timer isn’t turned on. Three mistakes I’ve made more then once.

But one rule I always keep in mind is ...
Think about the background.

Take this image. It was part of a music shoot I did over the past weekend. The result is not one of my best shots and I know I could do better. It's the boring brown background that lets the image down, Fortunately I was aware of this and had a plan.

I'd had a bit of a wait before the band came on stage, so I used that time to check the camera settings were all ok and take some meter readings. I also had a look at the stage and realised the background was going to be a problem. This wide shot should give you some idea of what I had to work with.

The background was going to be either brown or black and neither was looking good. Fortunately there was a small poster at the back of the stage and by moving into a central position and picking my moment I could get the artist behind it.

Grizzly South - Live

Hopefully you’ll agree that changing the background lifts the image from a good shot to and eye catching great shot.

So remember, backgrounds are important and a good one will compliment and even enhance your main subject.